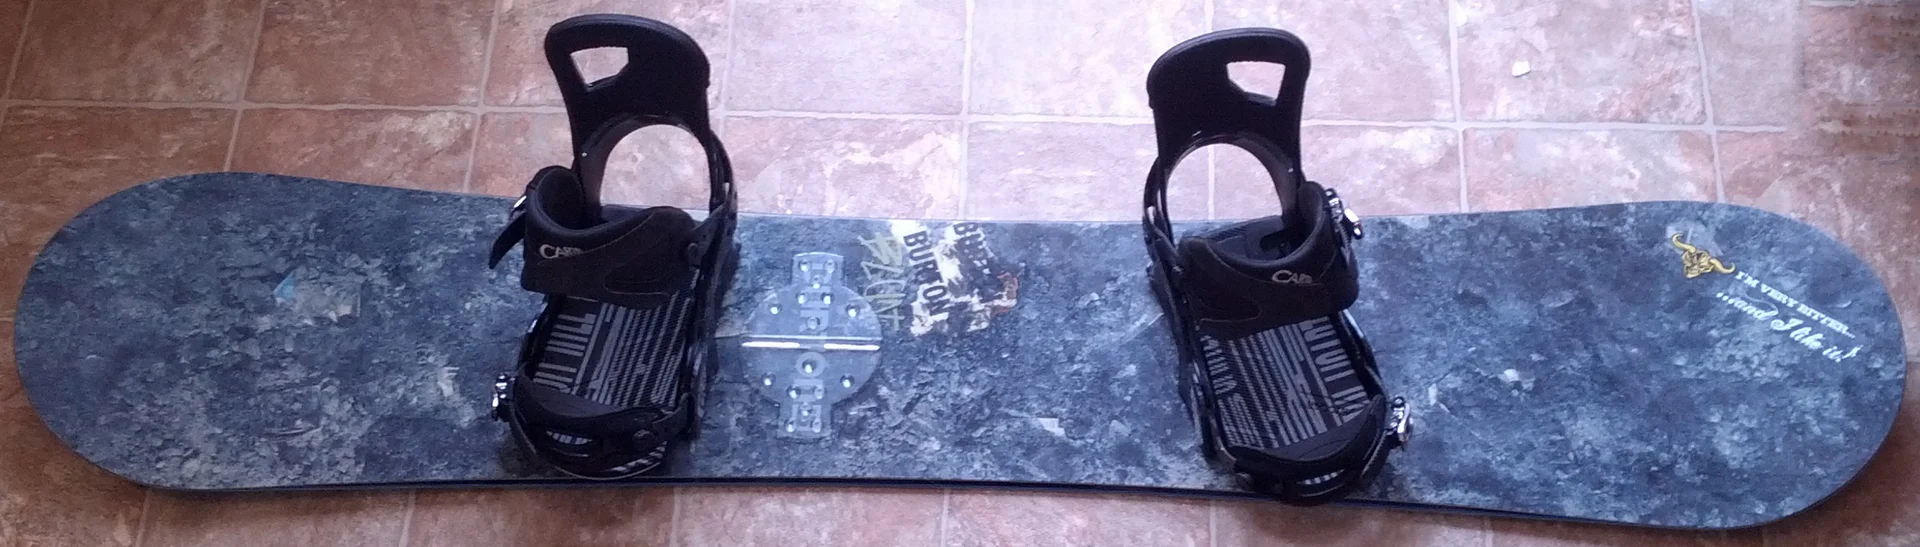
One-page setup / prepare then pack
Set it up.
Pack it once.
Fit the boots, mount the stance, finish the base, then pack the rest. One page; no article maze.
6 prep steps / 5 packing systemsBoard preparation / six steps
From loose kit to ride-ready.
Follow this order at home. Stop and use a shop for a lifted edge, delamination, deep core damage or a binding insert that moves.
- 01Fit the rider
Fit and dry the boots.
Use the boot that holds the foot without cutting off comfort or blood flow.
- Wear one thin snowboard sock. Tighten the liner first, then the outer shell.
- Standing tall, the toes may just brush the liner. Bend the knees: the toes should ease back and the heel should stay down.
- Reject numb toes, sharp pressure or strong heel lift. Liners loosen with use; an oversized boot gets worse.
- After riding, remove the liner and footbed. Air-dry at room heat—never on a radiator or hot heater.
- 02Check the platform
Inspect the board.
Start dry and clean. Small damage is easier to fix before it reaches the mountain.
- Confirm the maker’s rider-weight range and that the mounted boots will not hang far past the edges.
- Look for a lifted edge, split sidewall, deep core shot, loose insert or delamination. Take these to a repair shop.
- Use a gummy or diamond stone only for light rust and burrs. Do not file an edge unless you know its set angle.
- Before waxing, remove the bindings, brush off dirt and old wax, use base-safe cleaner if needed, then let the base dry.
- 03Mount the system
Set and test the stance.
Use the board’s reference marks first. Change one thing at a time after riding it.
- Choose regular or goofy. Start near shoulder width; the board’s reference stance is the better first mark.
- A useful beginner range is about +15° at the front and 0° to −6° at the rear. Comfort beats copying a pro.
- Place each laced boot in its binding. Balance toe and heel overhang, center both straps and keep the toe ramp inside the board edge.
- Start every screw by hand. Tighten with a #3 hand screwdriver in a cross pattern. Do not use a power tool or thread-lock. Recheck after the first run.
- 04Prepare the base
Clean and choose the wax.
Wax works best on a clean, dry base in an aired workspace.
- Secure the board base-up. Wear eye cover for edge work and keep moving air through the room.
- Brush nose to tail. Use a clean cloth and base-safe cleaner only when needed; let all cleaner dry.
- Choose fluoro-free wax for the snow-temperature range on the pack. All-temperature wax is the simple home option.
- Use a dedicated wax iron, a sharp plastic scraper and a clean brush. Do not sand the whole base by hand.
- 05Hot wax
Iron a thin coat, then cool.
Heat spreads wax into the base. More heat does not mean more wax uptake.
- Set the iron to the wax maker’s temperature. Wax should melt easily but never smoke.
- Drip a thin line over the running base. Move the iron from nose to tail in smooth, joined passes and never leave it still.
- Keep a wet wax trail behind the iron. Add a little wax only where the iron drags or the base looks dry.
- Cool flat to room temperature for at least 10–30 minutes, or use the time on the pack. Fiberlene tuning paper is optional; kitchen wax paper is not a substitute.
- 06Finish the base
Scrape and brush it clean.
The wax belongs in the base, not as a thick sheet on top of it.
- Use a sharp 3–5 mm plastic scraper. Clear wax from the metal edges first.
- Hold the scraper at a slight angle—about 45° works—and make overlapping nose-to-tail passes until no visible film remains.
- Do not use a metal scraper for routine wax. It is a repair tool and can cut or gouge the base.
- Brush nose to tail: bronze or fine steel for 5–10 passes, then nylon for 5–10 passes. With one home brush, use stiff nylon until loose wax stops coming out.
Optional packing reference
Pack the rest.
The setup is complete above. Open only the system you need and use each row as a final pack-or-leave check.
Maker examples, not rankings. Links checked 23 July 2026. Confirm the exact size, model year and fit before paying.
01 / Ride systemThe parts that steer the board
Fit and compatibility decide these purchases. Beginners can rent the board and bindings while buying boots only after a proper fitting.
4 items
The parts that steer the board
Fit and compatibility decide these purchases. Beginners can rent the board and bindings while buying boots only after a proper fitting.
- Fit + flex profile · Start here
Soft-to-medium snowboard boot profile
A forgiving category many learners can compare after establishing the right shell volume and heel hold.
Check: Fit in person with one thin snowboard sock; compare support, not just flex numbers, and reject numbness or sharp pressure. - Demo before buying · Useful next
All-mountain board demo shortlist
A broad category to test after rental days—not a claim that one brand, flex or profile works for everyone.
Check: Treat rider weight and boot-compatible width as non-negotiable, then demo different flex and camber or rocker profiles on the terrain you ride. - Compatibility · Useful next
Snowboard bindings
Transfers boot movement into the board and holds your chosen stance.
Check: Match boot size, mounting system and board width; center toe and heel overhang. - Lift exits · Optional progressionOptional profile examplesSee market examples
Stomp pad
Adds traction for the unstrapped rear foot while skating and unloading.
Check: Choose a low-profile shape and install only on a clean board using its instructions.
02 / Protection & visionProtect the day, preserve the view
Choose snow-sports equipment that fits together cleanly. Protection reduces some risks; it does not make terrain or speed consequence-free.
5 items
Protect the day, preserve the view
Choose snow-sports equipment that fits together cleanly. Protection reduces some risks; it does not make terrain or speed consequence-free.
- Head protection · Start here
Snow-sports helmet
Designed for snow-sports fit, coverage and cold-weather use.
Check: It should sit level, move with the scalp and pair with goggles without a large gap. - Vision · Start here
Snow goggles + low-light lens
Protects the eyes and keeps terrain features readable in wind, snow and flat light.
Check: Test with your helmet and choose a lens for the conditions you ride most. - Impact protection · Useful nextOptional profile examplesSee market examples
Snowboard wrist guards
A beginner-oriented layer of wrist protection during frequent low-speed falls.
Check: Confirm compatibility under your gloves and follow the guard maker’s sizing guidance. - Impact protection · Optional progressionOptional profile examplesSee market examples
Impact shorts
Adds padding around hips and tailbone for learning days and park progression.
Check: Make sure padding stays in place in a squat and does not restrict circulation. - Impact protection · Optional progressionOptional profile examplesSee market examples
Low-profile knee pads
Adds cushioning for kneeling, binding adjustments and repeated beginner falls.
Check: Use a flexible low-profile pair that does not bunch inside snow pants.
03 / Weather systemDry, adjustable layers for Japan
Build a modular system that can handle lift wind, wet snow and warmer active laps without relying on one oversized insulated jacket.
7 items
Dry, adjustable layers for Japan
Build a modular system that can handle lift wind, wet snow and warmer active laps without relying on one oversized insulated jacket.
- Next to skin · Start hereOptional profile examplesSee market examples
Moisture-managing base layers
Moves moisture away from the body and makes warmth easier to regulate.
Check: Choose synthetic or wool fabric, a close but mobile fit and avoid cotton. - Insulation · Useful nextOptional profile examplesSee market examples
Adjustable mid-layer
Adds removable warmth for cold lifts without locking you into one heavy jacket.
Check: Check that it layers without compressing movement or blocking shell ventilation. - Storm layer · Start hereOptional profile examplesSee market examples
Waterproof shell jacket
Blocks wind and wet snowfall while letting you adjust insulation underneath.
Check: Look for usable vents, helmet-compatible hood movement and cuff overlap. - Storm layer · Start hereOptional profile examplesSee market examples
Snow pants or bib
Keeps the lower body dry through seated breaks, falls and deep snow.
Check: Confirm boot gaiters, unrestricted squatting and enough room for optional pads. - Boot interface · Start hereOptional profile examplesSee market examples
Thin snowboard socks
Manages moisture without adding folds or excess bulk inside a fitted boot.
Check: Use one over-the-calf pair; doubling socks can reduce circulation and control. - Hands · Start hereOptional profile examplesSee market examples
Waterproof gloves or mitts
Keeps hands protected during storms, binding work and long lift rides.
Check: Test dexterity on buckles and make sure cuffs overlap your jacket cleanly. - Storm accessory · Useful nextOptional profile examplesSee market examples
Neck warmer or balaclava
Closes the gap around the collar and adds adaptable face coverage.
Check: Choose breathable fabric that sits comfortably under the helmet without bunching.
04 / Care & travelKeep the setup moving
A small tool and sensible travel protection solve more real problems than novelty accessories. Follow the manufacturer’s care instructions.
6 items
Keep the setup moving
A small tool and sensible travel protection solve more real problems than novelty accessories. Follow the manufacturer’s care instructions.
- On-hill adjustment · Start hereOptional profile examplesSee market examples
Snowboard multi-tool
Handles common binding checks and small stance adjustments during a trip.
Check: Confirm the bits match your binding hardware; never overtighten or improvise fasteners. - Base care · Useful nextOptional profile examplesSee market examples
Hot-wax kit
Supports regular base care once you are ready to maintain your own board.
Check: Use a dedicated temperature-controlled iron, scraper and brush with ventilation. - Edge care · Optional progressionOptional profile examplesSee market examples
Edge-care kit
Removes light burrs and maintains predictable edge feel between shop services.
Check: Learn the correct angle first; major damage and base grinding belong with a technician. - Travel · Useful nextOptional profile examplesSee market examples
Padded snowboard bag
Protects the board and contains wet equipment during flights and transfers.
Check: Measure your board, allow binding clearance and review airline size rules. - Travel · Optional progressionOptional profile examplesSee market examples
Boot bag or dry tote
Keeps boots, helmet and damp accessories organized between accommodation and resort.
Check: Prioritize ventilation and a layout you can carry alongside the board bag. - Drying · Optional progressionOptional profile examplesSee market examples
Low-heat boot dryer
Helps dry liners and gloves between consecutive Japan storm days.
Check: Use gentle heat and follow the boot and liner manufacturer’s care limits.
05 / Conditioning kitOptional tools for off-snow training
The SBTV conditioning plan works without equipment. These tools add resistance, support or recovery options only after the bodyweight version feels controlled.
8 items
Optional tools for off-snow training
The SBTV conditioning plan works without equipment. These tools add resistance, support or recovery options only after the bodyweight version feels controlled.
- Floor work · Useful nextOptional profile examplesSee market examples
Exercise mat
Adds comfort for dead bugs, side planks, 90/90 switches and recovery work.
Check: Choose enough grip that hands and feet stay planted during controlled movement. - Hip control · Optional progressionOptional profile examplesSee market examples
Mini resistance bands
Adds light resistance to squats, lateral steps and hip-control drills.
Check: Begin with light resistance and keep knee tracking smooth rather than chasing fatigue. - Assistance + resistance · Optional progressionOptional profile examplesSee market examples
Long resistance band
Can support split squats or add progressive resistance to strength work.
Check: Inspect for damage, anchor securely and keep the band away from the face. - Single-leg control · Useful nextOptional profile examplesSee market examples
Stable step or training bench
Provides a consistent height for step-downs, supported squats and calf raises.
Check: Use a non-slip, non-wobbling surface and begin with a low height. - Balance progression · Optional progressionOptional profile examplesSee market examples
Balance pad
Progresses single-leg balance after stable floor control is easy.
Check: Place it beside support and do not use unstable surfaces for jumping drills. - Strength progression · Optional progressionOptional profile examplesSee market examples
Adjustable dumbbell or kettlebell
Adds measurable load to squats, split squats and controlled hinge patterns.
Check: Increase load gradually while leaving several technically clean reps in reserve. - Recovery · Optional progressionOptional profile examplesSee market examples
Foam roller + mobility ball
Offers a simple option for short post-training soft-tissue and mobility sessions.
Check: Use tolerable pressure and avoid rolling directly over injured or painful areas. - Aerobic intervals · Optional progressionOptional profile examplesSee market examples
Jump rope
Adds compact conditioning intervals once quiet, pain-free landings are established.
Check: Use a clear, non-slip surface and switch to walking or cycling if impact is unsuitable.